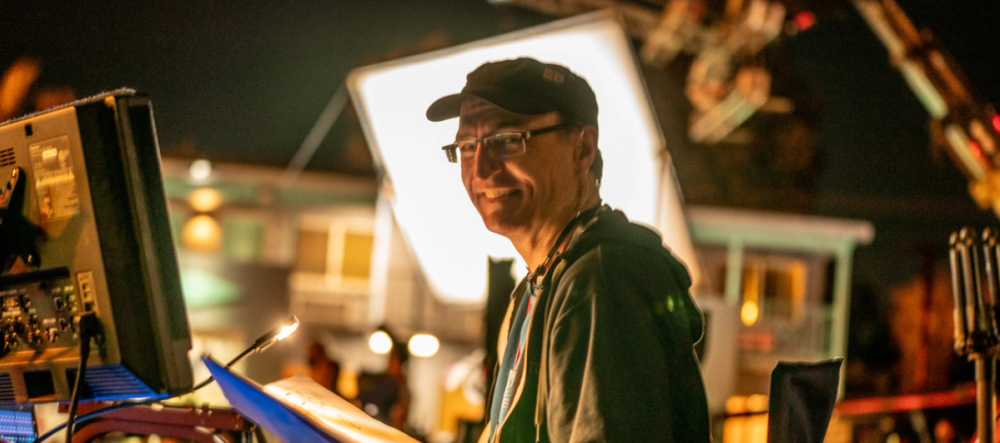
Programmers aren’t born—they are made. For most of the history of consoles, this skill has been taught from person to person. I love the personal touch, but that can limit who has access to the information. Since I’m all about sharing knowledge, I’ve been doing a video series that teaches the basics of Sidus Link Pro and the basics of programming at the same time.
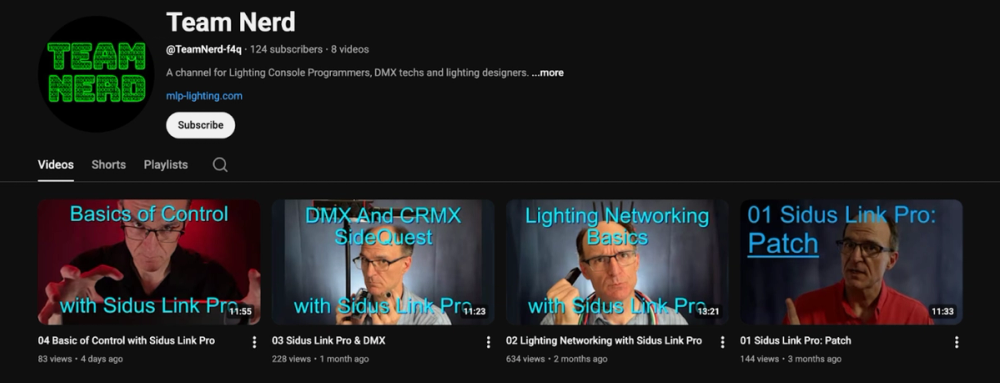
Check it out on my YouTube channel Team Nerd
But what if you’ve already watched the excellent Sidus Link Pro tutorials so you only need the programming insights? Good news—that’s what this blog is all about. This begins a little series that will follow the content from my videos and include a few more details and strategies that I had to cut for time. Whether you are an aspiring programmer or a gaffer who needs to keep competitive, having a clear idea of the job and how it’s done will make every day on set better and easier.
Why a Console?
Some of you may be wondering why everyone talks about CRMX and using consoles to control lighting. What makes it so good or so different? Well, controlling lights manually is slow and sometimes involves needing to clear your First Team from the shot to make a needed adjustment. Sidus Bluetooth (for instance) is wireless and fairly easy to implement, but can take a second or more to respond, or perhaps drop out of control and require a power cycle. Consoles and CRMX are much more reliable and less prone to misbehaving, and they offer some great opportunities.
There is something pretty magical about being able to change all the lighting in the room without touching a single light. In my on-set programming, I end up doing “interactives”, which are changing lights while the camera is rolling, fairly often. Using Cues (which are recordings of lighting looks) and CRMX (reliable wireless control for lighting), you can expect nice smooth transitions that happen just how you want them to. Since you can record each lighting look as a cue per camera setup, if your gaffer wants you to go back to what you had three shots ago, you can instantly give them what they ask for.
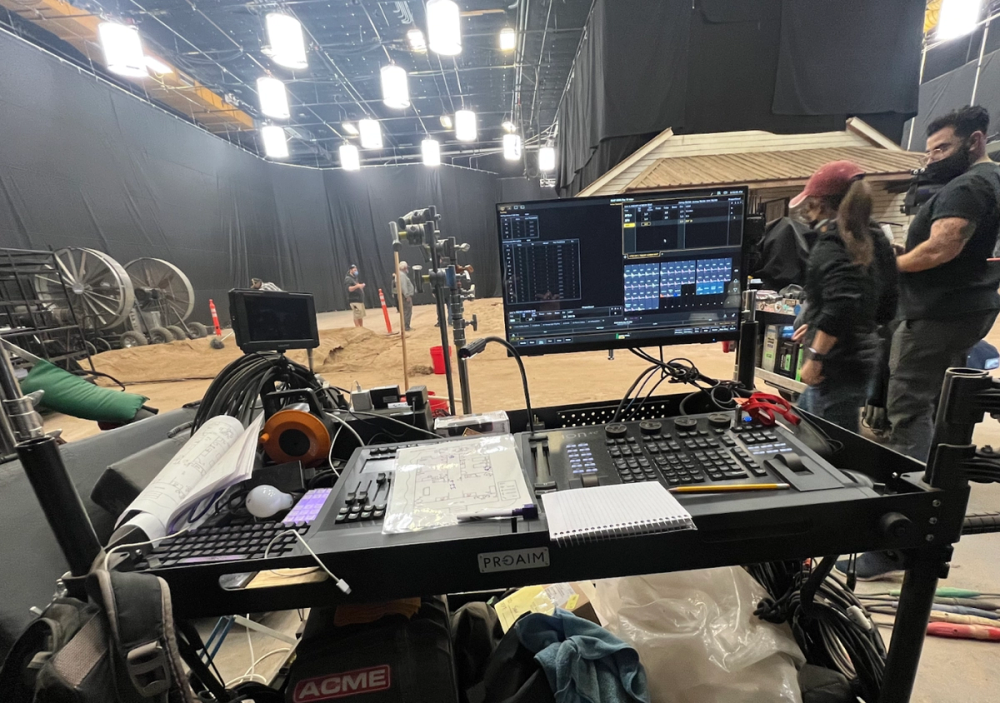
Lighting Consoles can be intimidating upon first look, but understanding the basic language of programming and syntax of data networking will bring you closer to building muscle memory when quick commands are needed to be executed
It can be more challenging in the short term to figure out the concepts and techniques, but knowing how to program this way gets you further in your career and makes Team Electrics look good. In this article, we’ll focus on Patch, Networking, and DMX. By the end, you’ll walk away with insights on how to prep and configure a show, how IP addresses and subnets work, and how to set up and choose between the different layouts of wireless control.
Live in the Patch
Patch is where you tell your console what your lights are and how they are configured. You can think of it as an agreement between all of your lights and your console. Every detail needs to match for things to work. Though the videos walk you through patching, I feel there are some things to define or make clear.
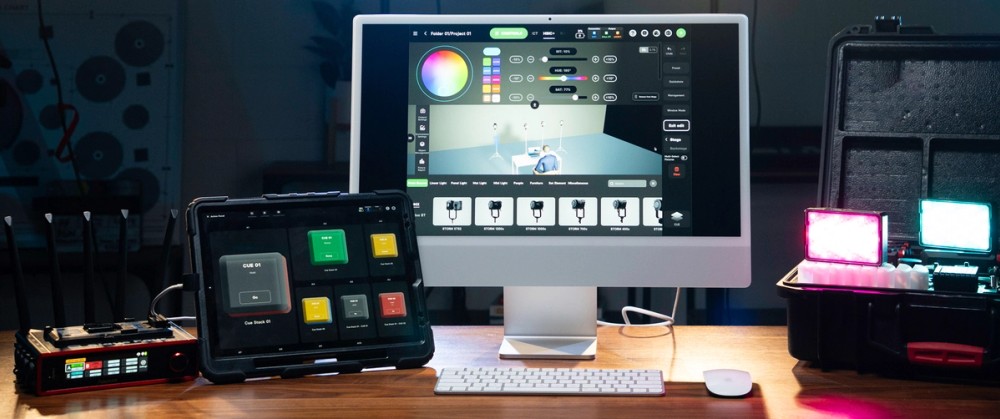
When you click the green + in the upper right-hand corner of Sidus Link Pro and choose Add New Fixtures, you have three choices.
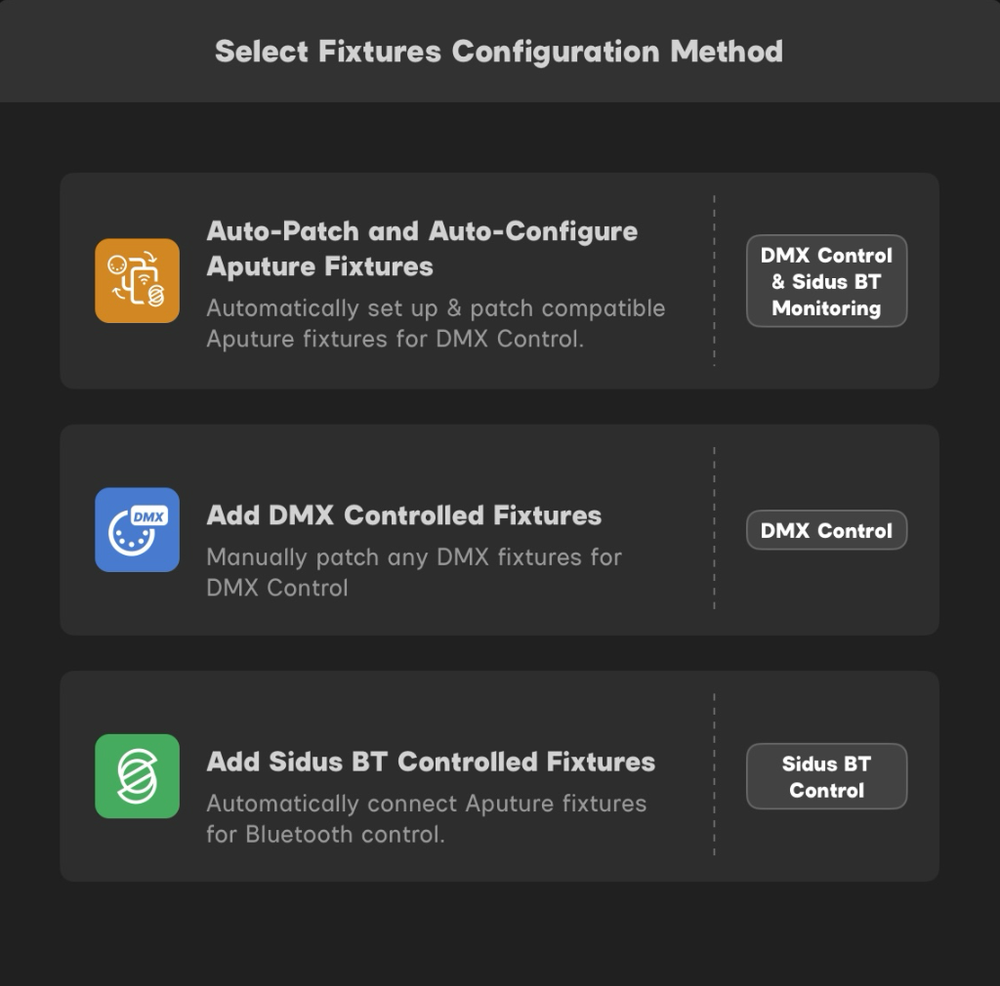
Sidus Link Pro interface when adding a new fixture
1. Auto-Patch is a very cool feature that can automatically configure your Aputure lights to work with Sidus. In other platforms, you are first configuring the console in patch and then you have to configure each light manually yourself. Doing both at once can be a great time saver.
2. Add DMX Controlled Fixtures This is how most consoles do patch. You pick your lights, choose the profiles, and set the starting address for each. Then you go and set the same info on the lights themselves. If you don’t already know:
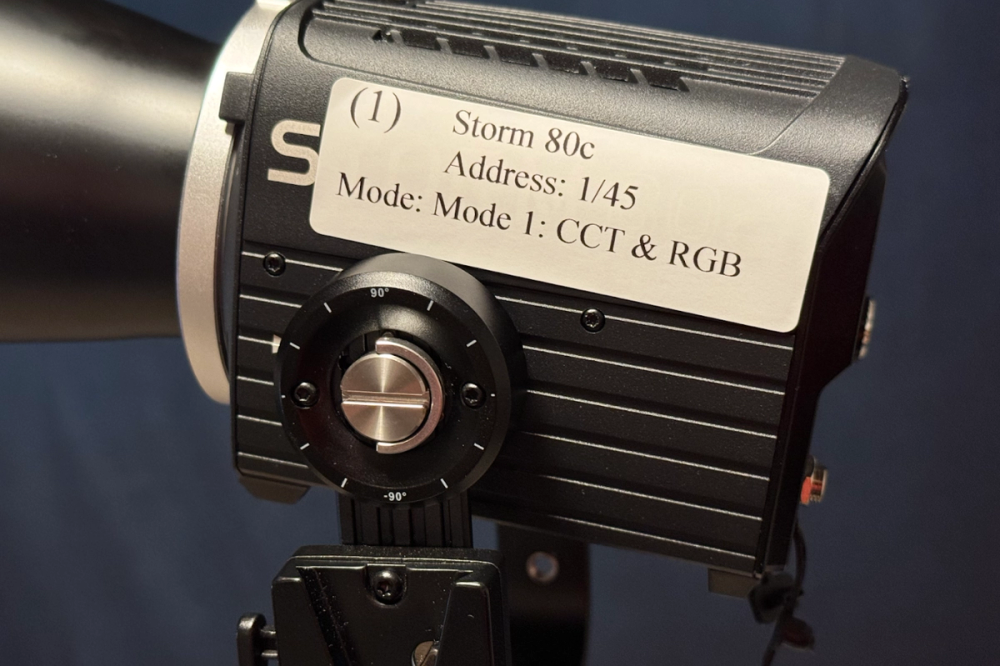
- Profiles (AKA Modes) are essentially a map of the functions of a light that allow you to control it. Read your fixture manuals to learn about and decide which profile supports your workflow.
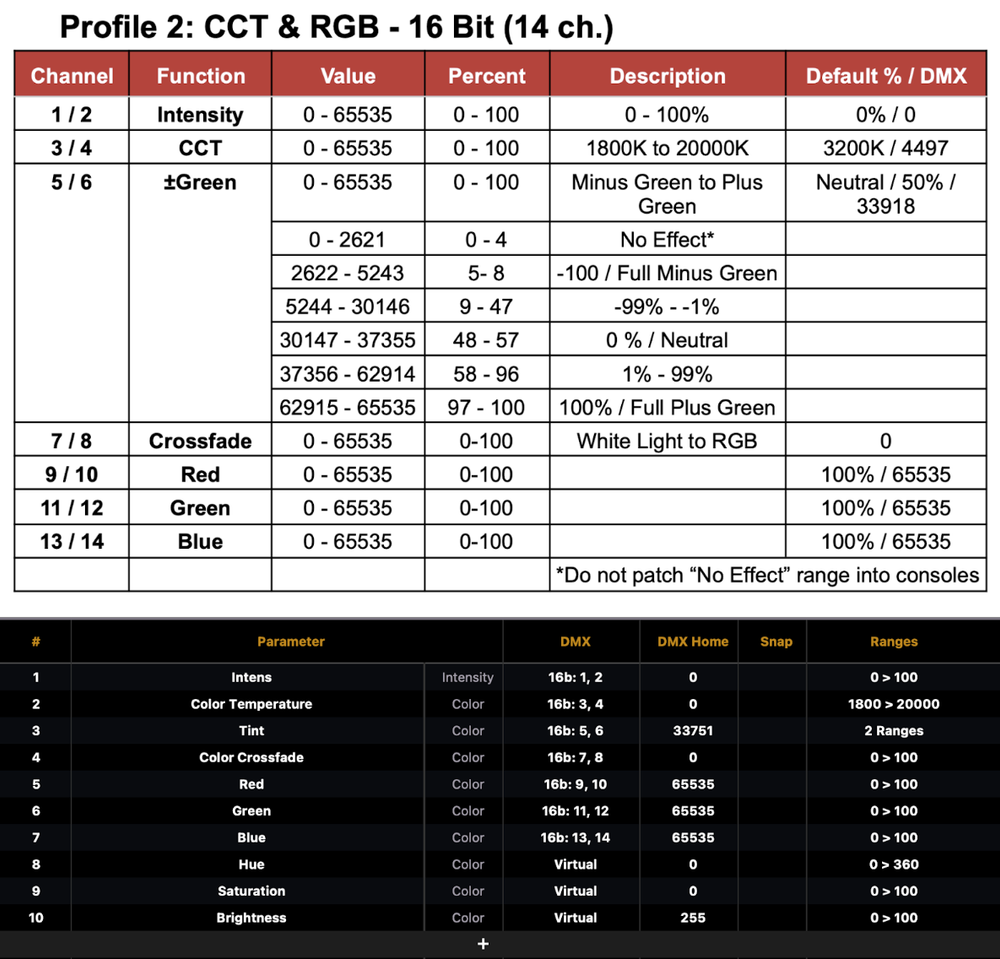
Profile for a STORM 80c in the manual (above) and in Eos (below)
- DMX is the control language of lighting. DMX, which stands for Digital Multiplex, has two main building blocks: Addresses (the “paths” that bring commands from the console to the light) and Universes (512 Addresses make up one Universe). Each DMX cable is only able to carry one universe each. There can be many universes.
- Address has two meanings: 1. Noun: The “paths” that commands travel to control a parameter in a light. 2. Verb: The process of setting a number (often called the starting address) at the light and in the console that makes sure the right commands are going from the console to the right light.

View of a (partial) universe of values in Sidus Link Pro
3. Add Sidus BT Controlled Fixtures This is the Aputure OG way to control their lights. It’s great for static looks, but CRMX controlled lights (CRMX is the favorite wireless DMX protocol in film) are better for interactive cues (changing the lighting during a take) and many other reasons.
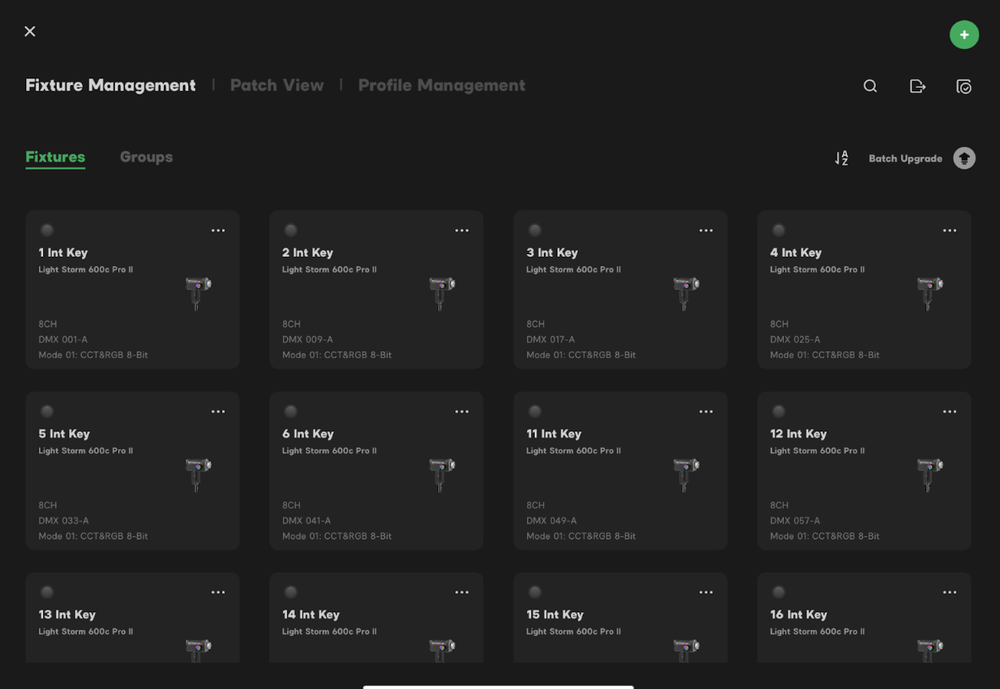
The Management tab where your patched fixtures live in Sidus Link Pro
Patch Practices: Tech Day and Shoot Day
If you add all your lights with the right profiles and addresses to Sidus Link, then go to your lights and set them to match the profiles and addressing in SLP, you will be able to control the lights and do your job. Not too hard. So let’s talk about a few strategies to make each day easier.
- Forget Everything Step one when configuring a light is to reset it to factory defaults. There are WAY too many options in a modern fixture, so start from a known place every time.
- Choosing a Profile I always choose a profile that gives me both CCT and color control. Depending on the light and what I need it to do, I’ll choose between 8 bit and 16 bit. Basically, an 8 bit value saves space in your patch because it uses fewer addresses. A 16 bit can be worth it though because it offers much more fine control.
- Play Favorites Does your Gaffer have a favorite light or lights? Patch those first. This will put them at the top of the list of fixtures to choose and will save you time scrolling to find the fixture.
- What do you call it? SLP will name and number your lights for you. But since it numbers them in series (LS 600 1-8, MC 1-6) you will have more than one number one. It might be easier to use Rename on each light and number your lights in sequence rather than by type. If you have a stage or location setup, you could even add a (very) short name to know what purpose it has. Looking at the picture, “1 Int Key” stands for the first key light in the interview area.
- Label Everything You can export a CSV file from SLP once you’ve done your patch. You can open this in any spreadsheet software and use it to print labels to put on your lights. This both speeds up your prep time, and makes it easy for you and your crew to tell you which light is flying in. If you follow my naming/numbering advice above, make sure the number is big enough to read from a distance! 2 inch by 4 inch labels tend to work well.
Clear labeling practices will make programming, operating, and troubleshooting infinitely easier on the day
Networking
Usually when I teach, I don’t dive into networking right away. But with SLP- networking is the only way to control your lights! So let’s do a little walk through of how Networks function and how to get them working for you.
In general, Networking is like mailing a package. There is a certain way to identify yourself and your recipient for the package to arrive where you intend. The two main things you interact with are IP Addresses and Subnet Masks.
Right now, the device you are reading this post on is most likely connected to a network. You didn’t choose the IP and the subnet; a machine did it for you using a protocol called DHCP. In lighting, it can be a matter of preference to have DHCP choose your IP address or to configure it manually. But sometimes that choice can be taken away from you. An example using the Sidus Four: DHCP works on the wireless connection, but there is no DHCP available when you connect an Ethernet cable from your iPad to the Sidus Four. So it’s good to know both ways.
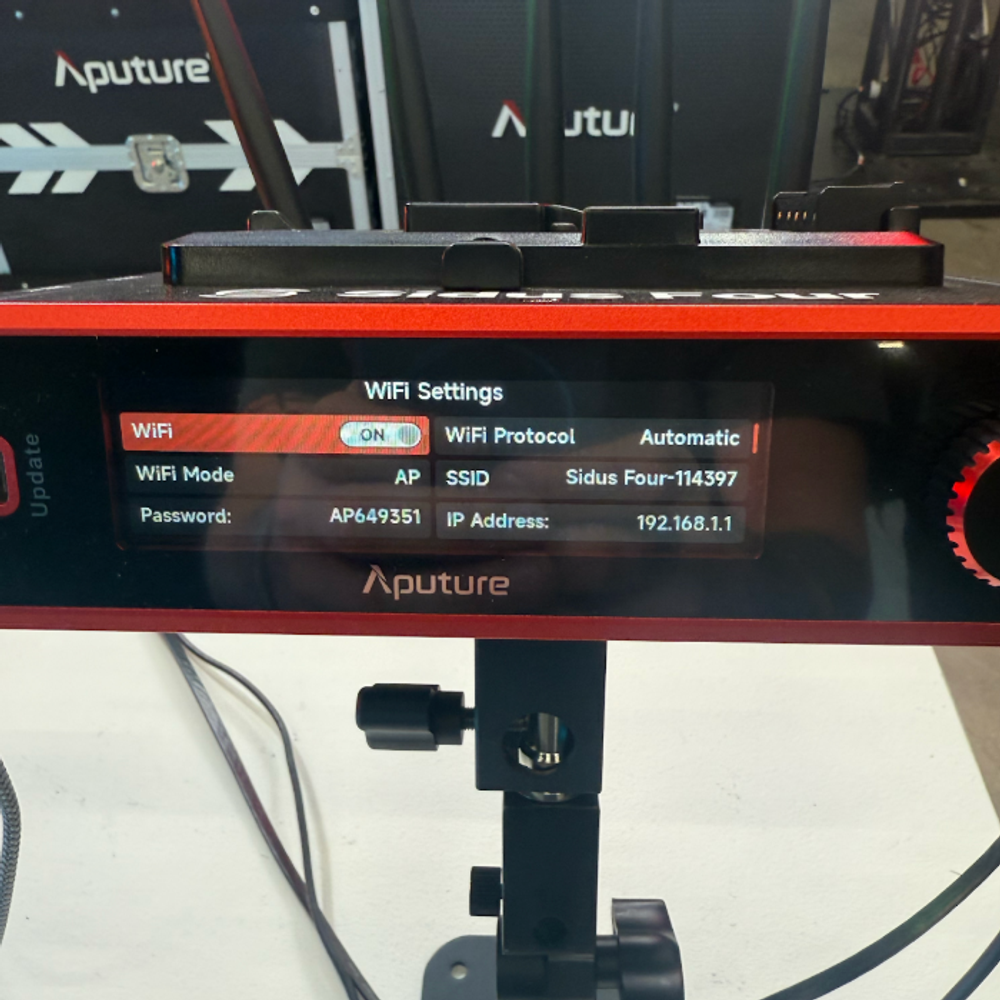
Sidus Four Wi-Fi settings: establishing a wireless connection between your iPad with Sidus Link Pro and your Sidus Four
Easy With DHCP
A factory reset Sidus Four will always be ready to use DHCP on wireless. Sign your iPad onto the network using the password written on the sticker on your transmitter. You already have an IP address and a subnet, as does the Sidus Four. So what is it?
By default, Sidus assigns itself the following:
192.168.001.100 (the IP address)
255.255.255.000 (the subnet)
The first key to understanding what this means is to notice that the subnet only has two values: 255 or 000.
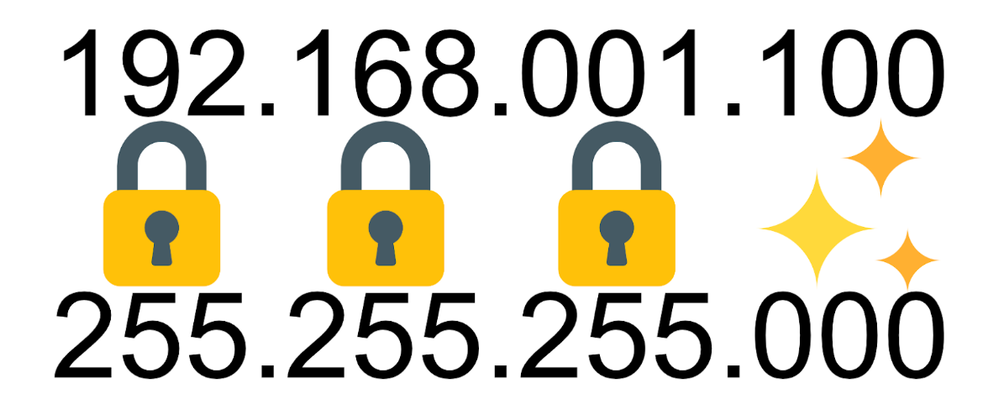
IP Address on the top with Subnet below. Anything with 255-don’t change it
When you see a 255, I want you to think: locked. You must keep those numbers the same. When you see 000, I want you to think: unique. You must choose unique numbers in that area. So if you want to network something to the Sidus Four, you need to match the 192.168.001 every time and then have almost any unique number after that. Why “almost”? Because the top number of any of these numbers between periods—each of the three digits is called an octet—can only go as high as 255.
Subnets being either locked or unique numbers is kind of like trying to communicate with your gaffer by radio on set.
- You need to be on the same film. So that’s the 192.
- You need to be on Main Unit— that’s the 168.
- You need to be on the Electrics channel— that’s the 001.
- No one should have the same number or name. With people, they have different voices and personalities that help us know who is who. Computers don’t have either— so this number MUST be unique. That’s the 100.
If we want to communicate with Sidus, everything needs to start with 192.168.001 and then must end with a unique number between 1 and 255.
So you could do 192.168.001.007 or 192.168.001.013 or any unique 3-digit number between 1 and 255 in this final octet.
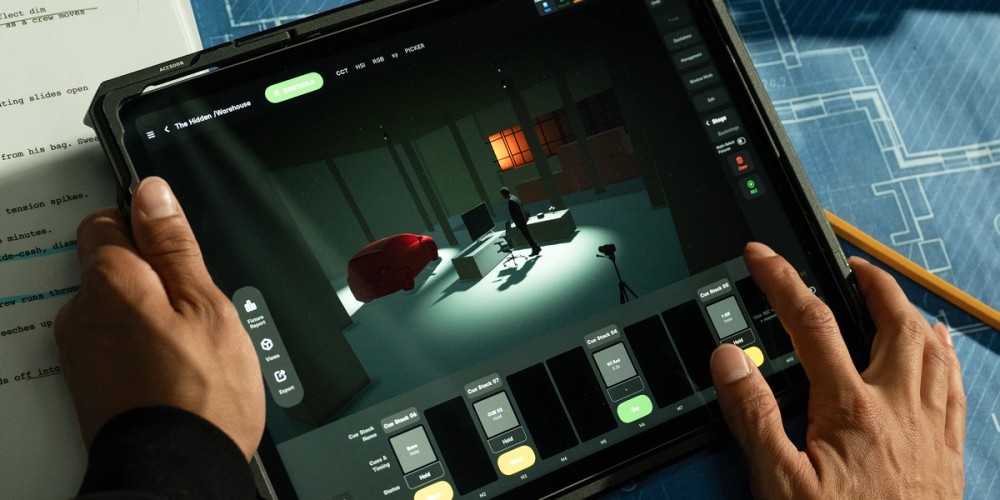
Applying these same principles, can you identify the octets of the IP address of the Sidus Four pictured below alongside the accompanying Subnet Mask of the Network?
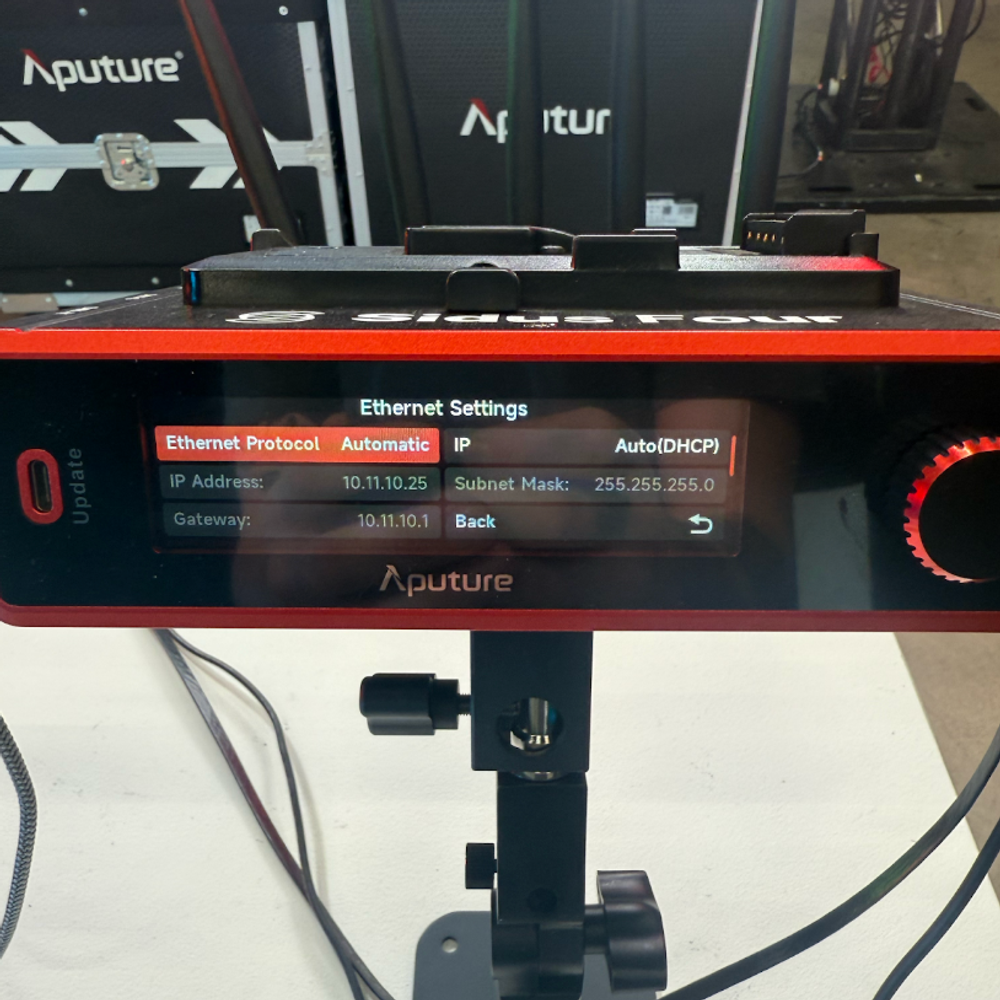
IP Address displays “010.” as the film, “011.” as the Main Unit, “010.” as the Electrics Channel, and “025” as the unique identifying end number
Manual IP
You can (of course) manually set the IP address for your iPad and Sidus Four. Why would you need to do this? If you use a hardline Ethernet cable to connect your iPad to your Sidus Four (which I highly recommend), there is no DHCP server on it. So you’ll need to set it yourself. Get directions on how to manually change your IP on your iPad and your Sidus Four from SLP DMX and CRMX at 4:58 on YouTube.) The info I gave you above will help you network anything together.
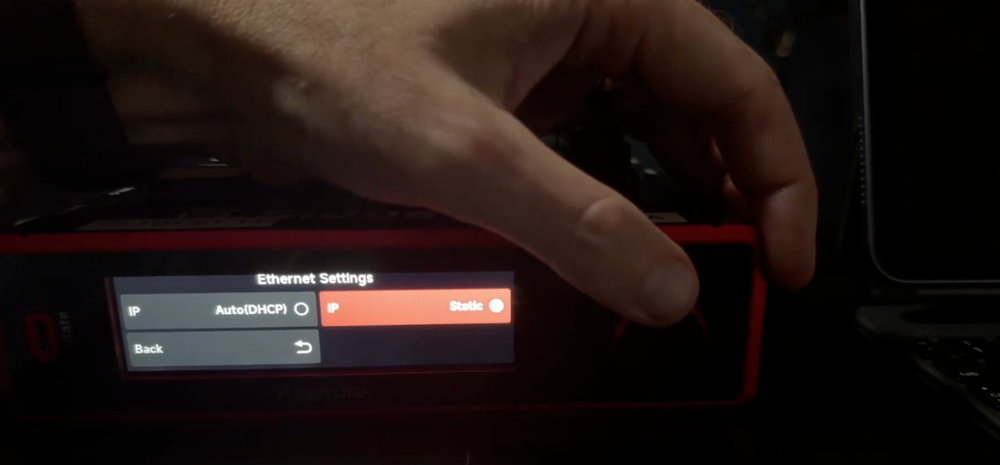
In Ethernet Settings on your Sidus Four, you can change your DHCP Settings from “Automatic” to “Static” allowing you, on your iPad, to turn off Wi-Fi and select within the Ethernet tab a Manual entry: from here, simply plug in your IP Address and Subnet Mask where prompted
What’s the Protocol?
Much like the fact you can choose between a variety of shipping companies, you can choose between more than one protocol to get your data from SLP to your lights. Those two ways are sACN and Artnet. Both are theoretically capable of running thousands and thousands of universes, but they both have strengths and weaknesses. I’m going to highlight just a few.
sACN:
- Will communicate with nodes outside of its IP range. This is because each universe of sACN has its own custom IP.
- Very network-efficient— you can run more universes on a network than on Artnet.
- Requires Multicast-supporting network switches to function best. So if you are in a setup and you find your data drops after 1-2 minutes of working, you are probably having a multicast problem.
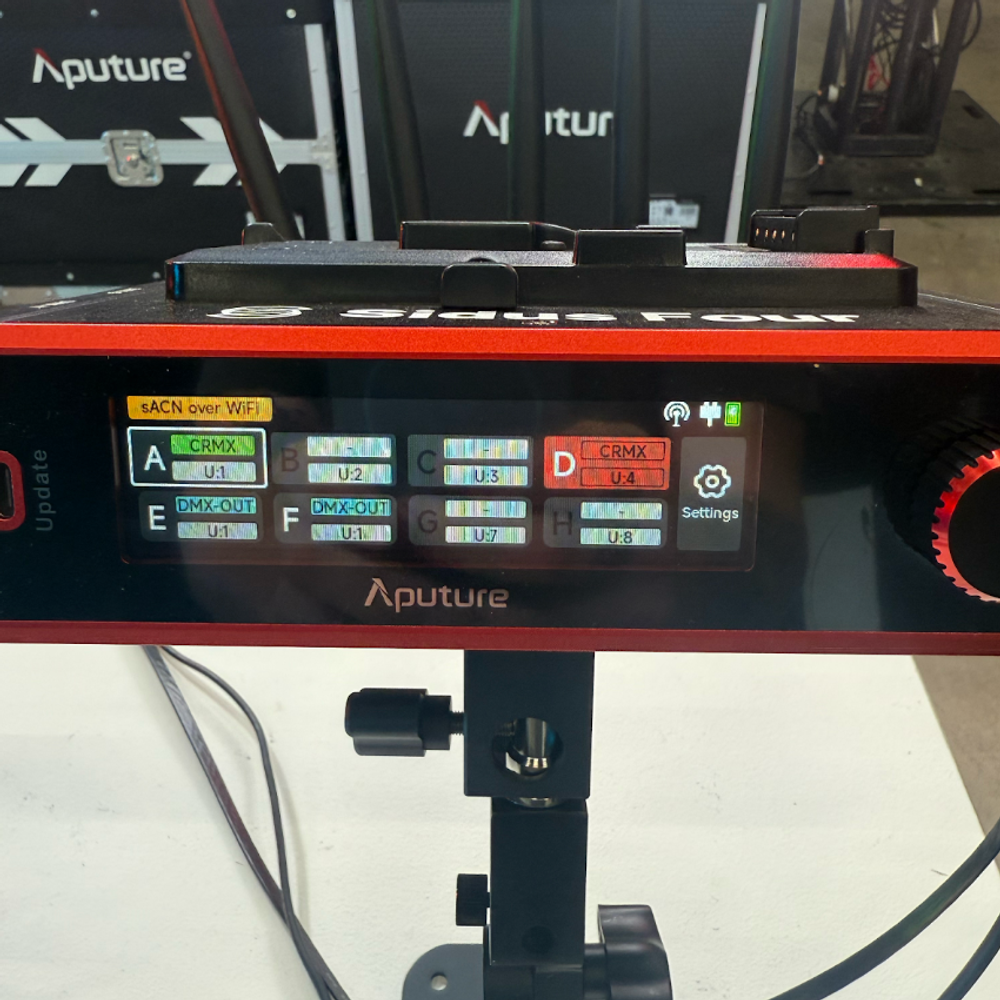
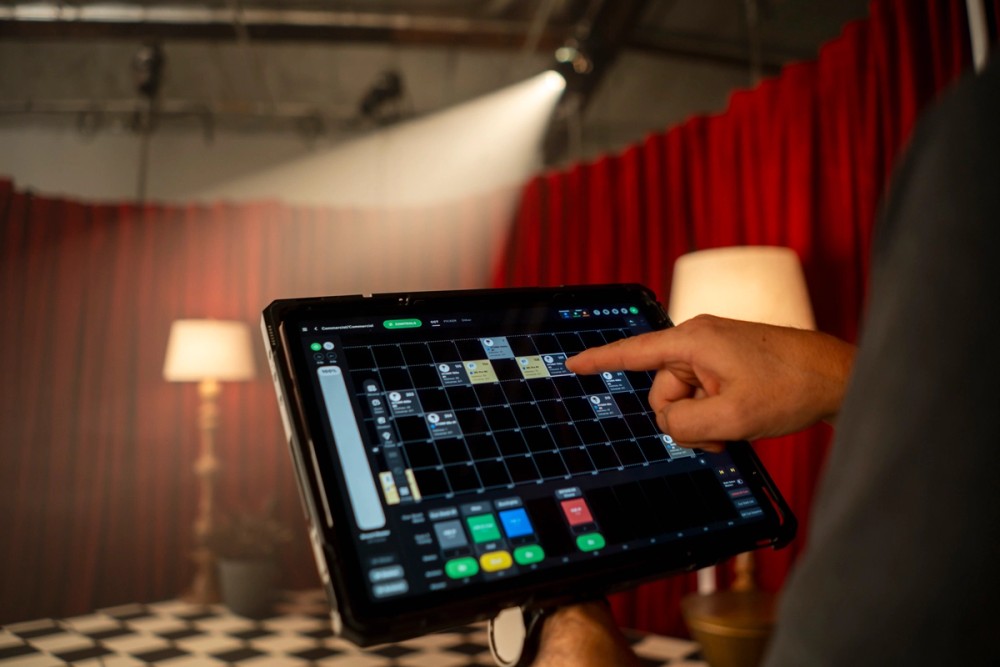
sACN broadcast over Wi-Fi from iPad with Sidus Link Pro to Sidus Four pictured here
Artnet:
- Requires strict IP and Subnet schemes to function. The rules I taught you above? Everything must be perfect.
- Offers the ability to use RDM over Ethernet to reconfigure lights you can’t easily reach.
- The universes start at 0 instead of one. This can be super annoying.
In a small network— there’s almost no reason to choose one over another. But sometimes switching from one to another may solve certain issues that come up.
Reliability in Data Networking
I feel strongly that hardline connections whenever possible are the best method- especially from your iPad to your transmitter. There is entirely too much wireless on set already, which all fights with each other. So any time you can choose to not turn something on- I feel that’s a good decision. In the Sidus Link Pro episode 03- DMX and CRMX starting at 4:03, I actually set up every combination that I could think of of wireless and wired and show you the results on two STORM 80cs. Check it out for yourself, or just use a hardline whenever you can.
So if wireless lighting control is so good and readily available, why use hardline?
DMX
To get into the subject of DMX, I’m going to select a moving light I have patched, switch to the RGB tab and set it to 10 percent.
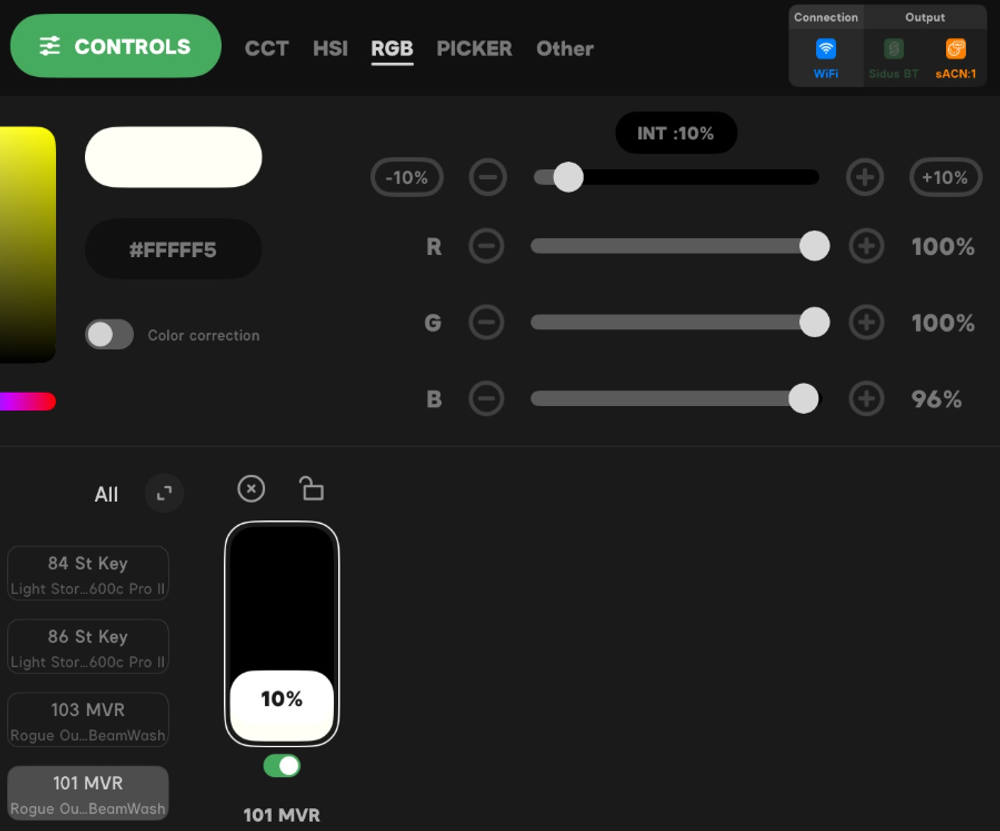
DMX is not 1-100%
Looking at all those 0 to 100 values in the interface, you might think that that’s how DMX works. Let me show you that it’s not. Go to the upper right of the interface and touch the FV in the grey circle. Choose Channel view.

DMX is 0-255 (8-bit)
Now you’ll see that your values actually go from 0 to 255. That’s because DMX is an 8-bit protocol. Don’t tense up over the math- there’s very little to it.
DMX is the control language of lighting. It’s been around since it was published as standard in 1986. DMX stands for Digital Multiplex. It’s an 8-bit protocol, which means it has 256 steps of resolution between 0 and full. A simple way of saying that is the lowest value is 0 and the highest value is 255. Why is the top value not 256? Because zero IS a value, so that takes one of the steps. Remember when we moved the intensity from 0 to 10 percent? We actually moved it 0 to 25 in DMX as you can see.
So that’s an 8-bit value, but what about the 16-bit values? Take a look (above) at the pan and tilt parameters. See how they have two sliders each?
Let’s make an example of pan and tilt. Every moving light offers at least 540 degrees of pan range. Imagine trying to control 540 degrees with only 256 steps of resolution! Not the best idea. Two 8-bit addresses actually multiply each other when combined for control, so instead of 0 to 255, you suddenly have 0 to 65,535! That’s a LOT of resolution. More than enough for nearly any lighting task.
You might think it’s a simple decision to just assign every light a 16-bit profile. If you have unlimited universes, do it. If you don’t, then you have to think strategically. Spend your addresses like they are money…because they are.
A few more facts about DMX as a protocol:
- Though the connectors are most often a 5-pin configuration, the protocol only uses three of those wires.
- DMX is capable of running 3281’, though most people stick to 2000’ or under.
- DMX is a digital protocol that sends out the identical signal down both + and - wires. Why? Because if the wire passes near a magnetic field and the signal becomes corrupted, the fixture at the end examines the two signals at the other end to help interpret. That’s why DMX can go such long distances.
- You can only put 32 fixtures on one line of DMX from the console. You can use another line from a node or use a splitter if you need more.
- You can run DMX through Ethernet (I’m not talking about sACN or Artnet here), but it’s limited to the distance of Ethernet cables— which is about 328’.
- Terminating DMX is a safety issue. The current carried along a line of DMX is enough to stop a heart.
Well, as I often say in my videos, we’ve covered a lot. We went over Patch, Addresses, Profiles, Universes, IP Addresses, Subnet Masks, DHCP, and DMX. We covered best practice tips and tricks on all of these topics. In the next post, we’ll get into recording cues, CCTs, and color.